


Viral 1 Banana Muffins!
/
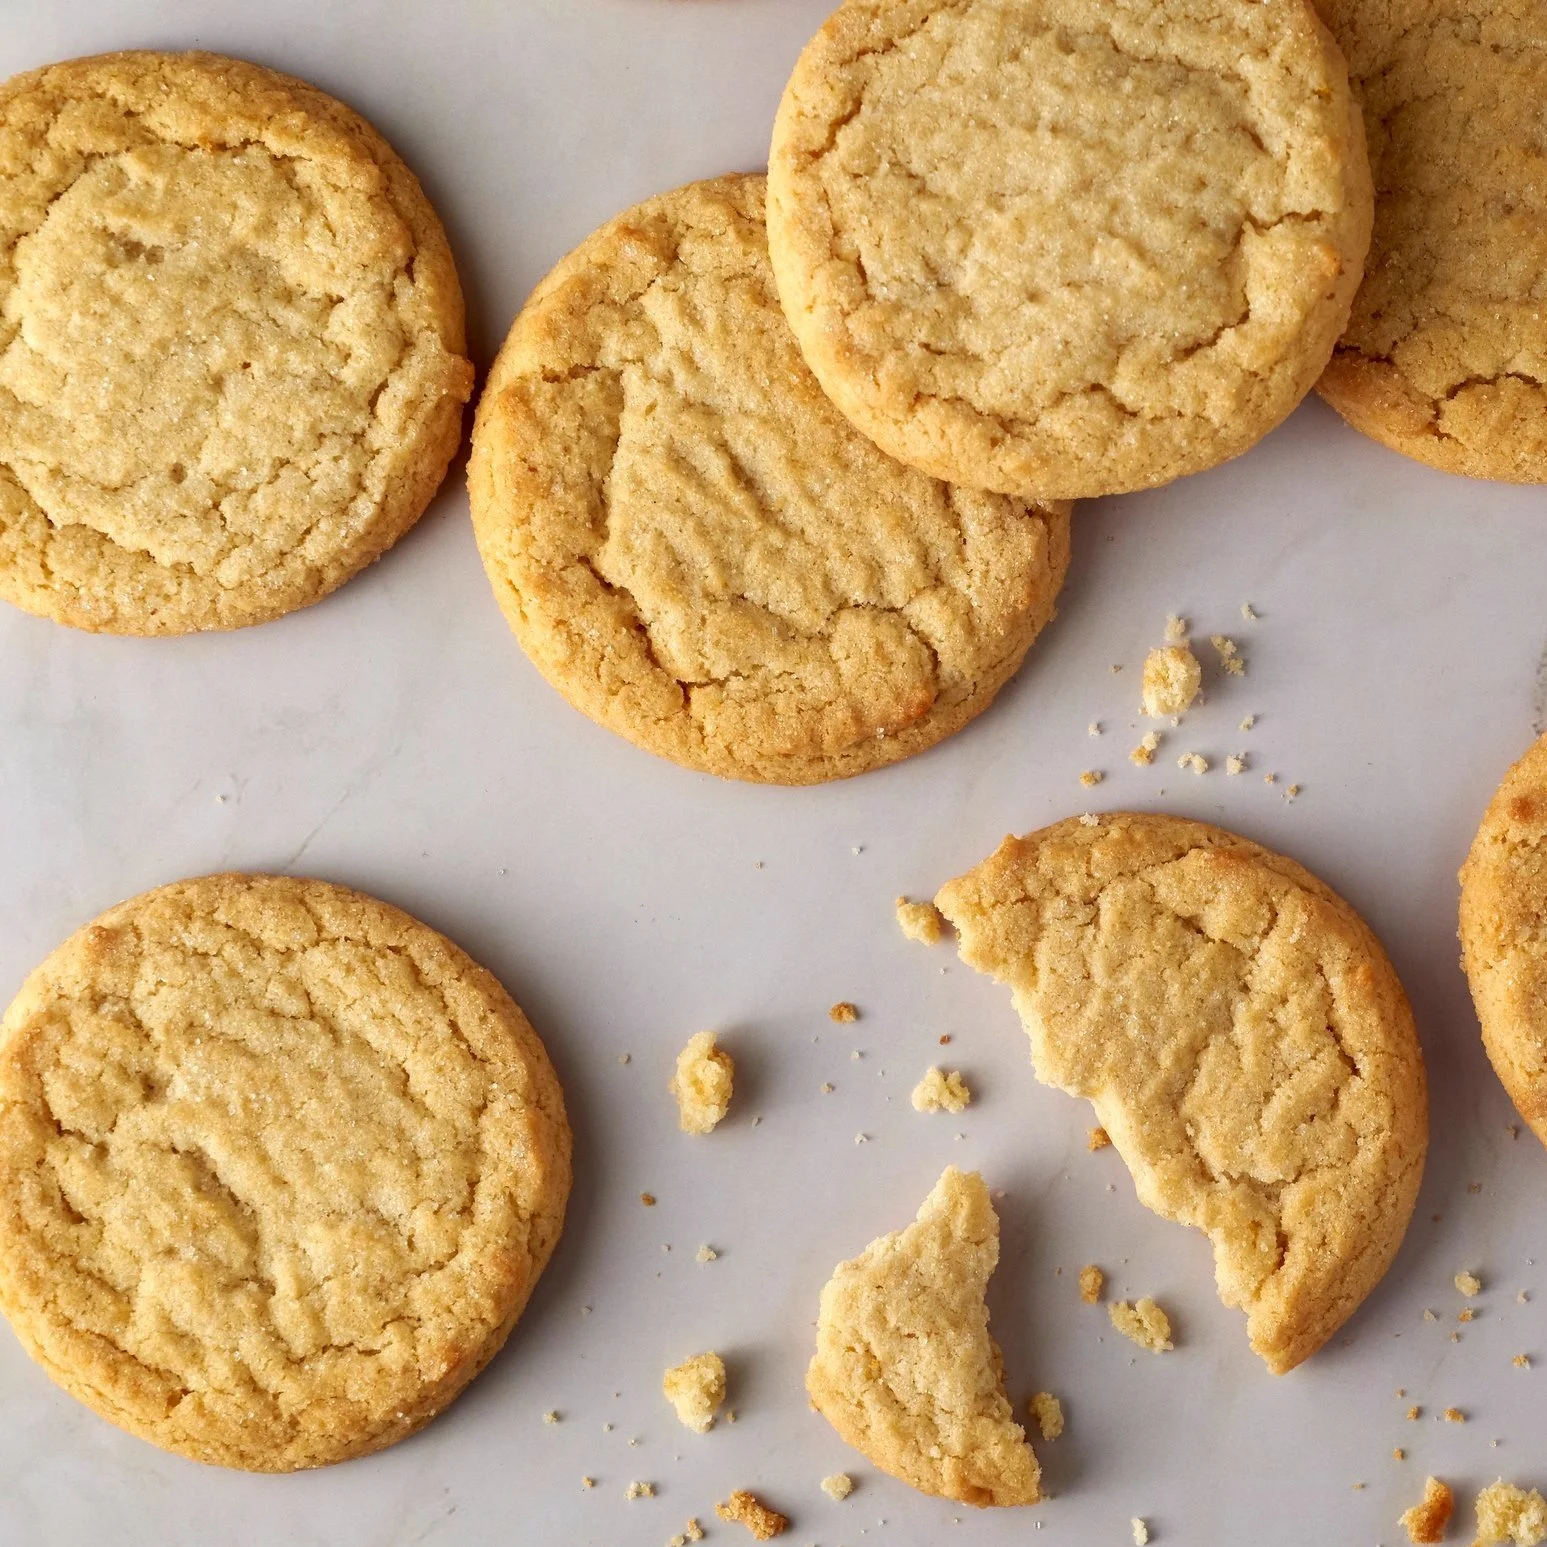
The viral 1 banana muffin recipe! No more throwing out that lone brown banana. Use it to make the most delicious breakfast muffins.
Read More
The viral 1 banana muffin recipe! No more throwing out that lone brown banana. Use it to make the most delicious breakfast muffins.
Read MoreWhen I found out that my son’s favorite show, Blue’s Clues & You! was having a Holiday Special on December 4th, I knew we had to make some Blue’s Clues themed holiday cookies and get ready to have the best day ever!
Read MoreCranberry juice - 5 different ways!
Read MoreSome fun and creative ways to use pistachios!
Read MoreWith one of my favorite holidays coming up, I’m always super excited to start baking! I love easy recipes that I can make with my son and that everyone will enjoy! These cupcakes are a classic and with orange icing and some fun Halloween cupcake liners, they’ll be a hit in your home too!
2 cups all-purpose flour
2.5 tsp baking powder
1/2 tsp salt
1/2 cup unsalted butter, at room temperature
1.5 cups granulated sugar
2 eggs
3/4 cup milk
1/2 cup vegetable oil
1 cup water
1 tbs vanilla extract
1/2 cup unsalted butter, at room temperature
4 cups powdered sugar
1/4 cup 35% whipping cream
2 tsp vanilla extract
1.Preheat oven to 350°F (180°C).
2. Whisk together flour, baking powder and salt; set aside.
3. In separate bowl beat butter with sugar until light and fluffy. Beat in eggs, one at a time and then the vanilla.
4. With mixer on low speed, add milk and then slowly add the flour mixture from step 1. Mix until there are no lumps.
5. Spoon batter into lined muffin tins until two-thirds full. Bake for 17-20 minutes, or until tester comes out clean when inserted into the centre of cupcakes.
6. Let cool completely before decorating!
1.Beat butter until light and fluffy
2. With mixer on low speed, add powdered sugar, cream, vanilla and salt until well mixed and there are no more lumps.
3. Increase mixer speed to high and beat for 2 minutes until fluffy.
4. Add frosting to piping bag or to ziplock back and cut off the corner to easily top the cupcakes with icing! Decorate with Halloween themed sprinkles.
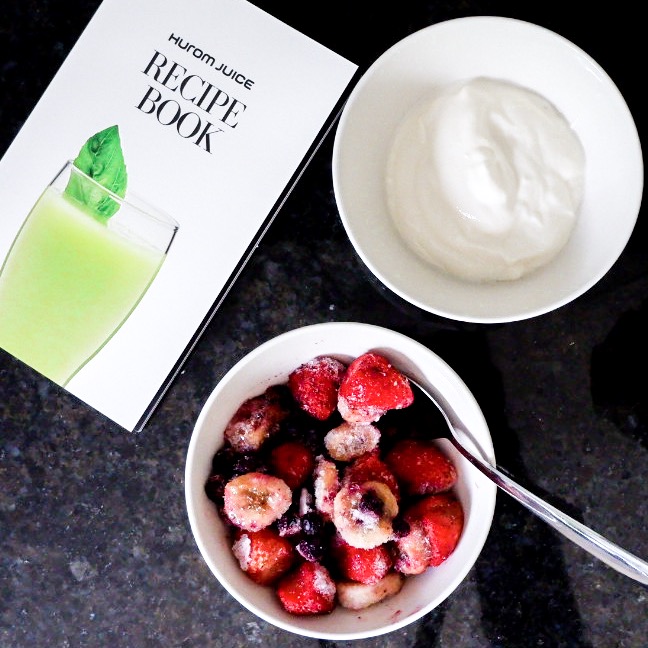
Making healthier choices everyday is sometimes a struggle for moms! We’re always on the go, have so little extra time and we often prioritize ourselves last. I’m always looking for tools and hacks that can help me indulge in the things I love the most, but that are simple and easy to use. I was so excited to get my hands on a Hurom juicer. I’ve heard so many amazing things about the machine and I couldn’t wait to experience it first hand!
I’ve heard that they are easy to clean, can make juices, smoothies AND ice cream (certain models) and they are absolutely gorgeous (so no need to try to hide it in a drawer when you’re not using it). They come in the most gorgeous colors, from rose gold to silver to black, so you’re guaranteed to find a model that fits in perfectly with your home’s style!
I tried the Hurom HZ Slow Juicer. It’s Hurom’s top-of-the-line juicer, made in stainless steel. It has a patented Slow Squeeze Technology that mimics that motion of a hand squeezing juice, so you’re guaranteed to have fresh juice that remains in its most natural state (and therefore packed with all the nutrients that you want your juice to have)! This juicer has all the bells and whistles that you would expect from a top-of-the-line juicer, such as a control lever and a fine and coarse strainer that allow you to control the amount of pulp in your juice, as well as parts that are made from quality materials. You feel it the minute you start to unbox it - the pieces are sturdy, heavy and able to withstand daily use (because it’s so amazing you’ll want to use it every day)!
One thing I noticed immediately, was how the pulp that came out of the machine was dry! I have a cheaper brand of juicer and I always feel like I’m wasting fruits and veggies because the pulp is wet, fleshy and filled with wasted juice! This is a problem I didn’t have with my Hurom!
As a busy mom on the go, one of my favorite features is how easy it was to clean. Other juicers that I have tried leak on my floor, take SO long to disassemble and wash and take forever to dry. The top fo this juicer detaches easily from the base, so it can be put in the sink, there is no leaking while you carry it, it comes apart in under 1 minute, and can be washed just as quickly! I major bonus was that is came with a drying rack so that I don’t have wet pieces all over my counter!
The Hurom HZ Slow Juicer works on everything you can imagine! Fruits, cruciferous vegetables, leafy greens, nuts and soybeans to create nutritious cold-pressed juices, milk, tofu, and more. I decided to try it out and make a juice and then ice cream! fruits, cruciferous vegetables, leafy greens, nuts and soybeans to create nutritious cold-pressed juices, milk, tofu, and more. I still can’t decide which I preferred! I made a delicious peach juice and added some sparkling water for an extra refreshing summer drink!
I added some sparkling water to my peach juice and it was DELICIOUS!
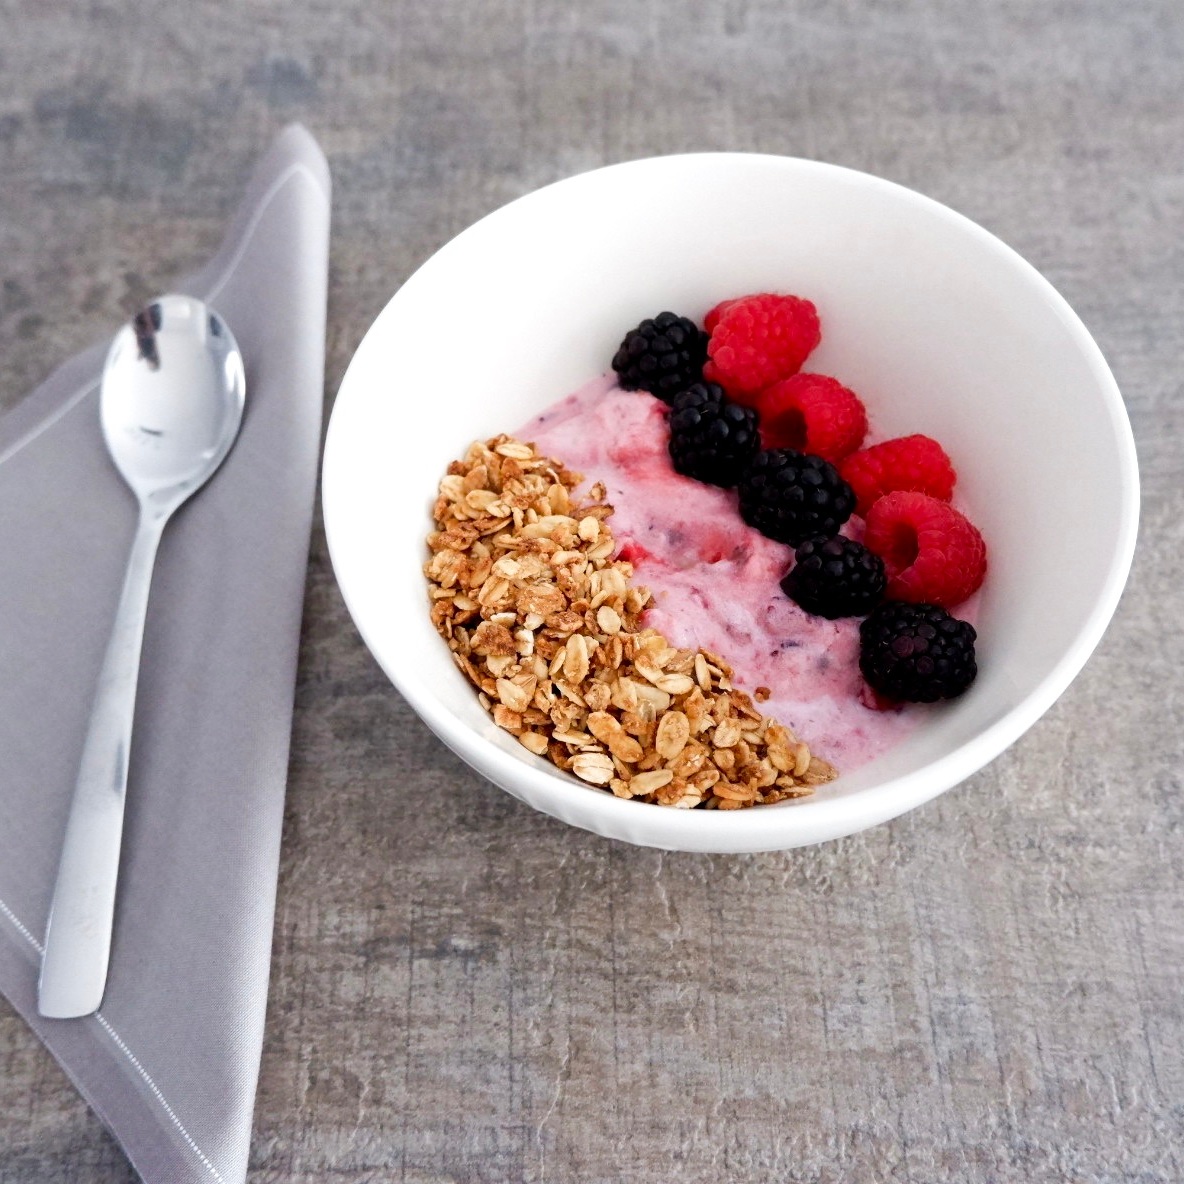
My juice was so delicious that I decided to make an ice cream smoothie bowl next! All you need is yogurt and frozen fruit! You’ll see below how incredible my smoothie bowl turned out! My final verdict? 10/10. This machine literally does it ALL. Smoothies, ice cream and slow pressed juice - there’s no reason to ever own another machine. It’s such good quality, so easy to clean and use, and the bonus is that it’s gorgeous too! Click here to visit Hurom’s website and check out the rest of their juicers!
Can you believe I made this with a juicer?
When I heard that Keurig had come out with a new coffee maker, I was intrigued. I am OBSESSED with my Keurig already for a few reasons and couldn’t imagine what they did to make it better! I can make my favourite blend of coffee at home, from Starbucks to Tim Hortons to Van Houte, at a fraction of the cost, it’s simple to use, easy to clean and looks great on my counter top. I didn’t think it could get better… until I received the Keurig K-Café Coffee, Latte & Cappuccino Maker.
The Keurig K-Café coffee maker has all the benefits of my original Keurig plus SO MUCH MORE.
Ready?
With the K-Café coffee maker, you can make cappuccinos and lattes! Yes. You read that correctly. A Keurig coffee maker that allows you to make your own Starbucks latte at home. There is a frother on the side of the maker that is so easy to use, you could basically do it with your eyes closed. You add the milk to the appropriate measuring line (cappuccino or latte) and press the button on the front. It even has a “cold” button which keeps your milk cold for your cold drinks!
That brings me to my next fave feature: it perfectly makes iced drinks! Now that summer is here, who doesn’t want an iced latte? Chose your fave blend, froth the milk with the “cold” setting, add a glass of ice and press the “latte” button on the top of the coffee maker and that’s it! A perfect, made at home iced latte that doesn’t cost $7 and doesn’t require me to clean a million pieces in a complicated machine!
For all you die hard black coffee fans aka sleep deprived moms, the K-Café coffee maker has got your back! On top of the cold drinks and milk frother (which should be enough to convince you that this coffee maker is the best), you can choose from 4 different cup sizes for your coffee, there is “strong” button to add more of bold taste to your regular cup of coffee and a “shot” button for the perfect latte and cappuccino or for those mornings when you have no time to enjoy a coffee but Need. That. Caffeine. Oh… or if you just enjoy espresso style coffee. #momlife
There are a few other added features that I think are super cool (but nothing beats the milk frother for me):
Auto-off function when the coffee maker is idol for 2 hours so it saves your mom brain from wondering if you turned it off.
A feature where you can turn on the coffee maker, add your pod and walk away and it will brew your coffee as soon as it is ready (with my old coffee maker I used to have to turn it on, wait for it to be ready and then insert the pod). No more wasted time!
Lastly, in case you weren’t aware, you can actually use regular ground coffee in your Keurig by purchasing one of their reusable pods! So if your fave brew doesn’t already come in a K-cup, no problem! There’s also a huge selection of Tea and Hot Chocolate Pods on the Keurig site that you can order and have delivered right to your door!
This shop has been compensated by Collective Bias, Inc. and its advertiser. All opinions are mine alone. #FlavorYourWorld #CollectiveBias
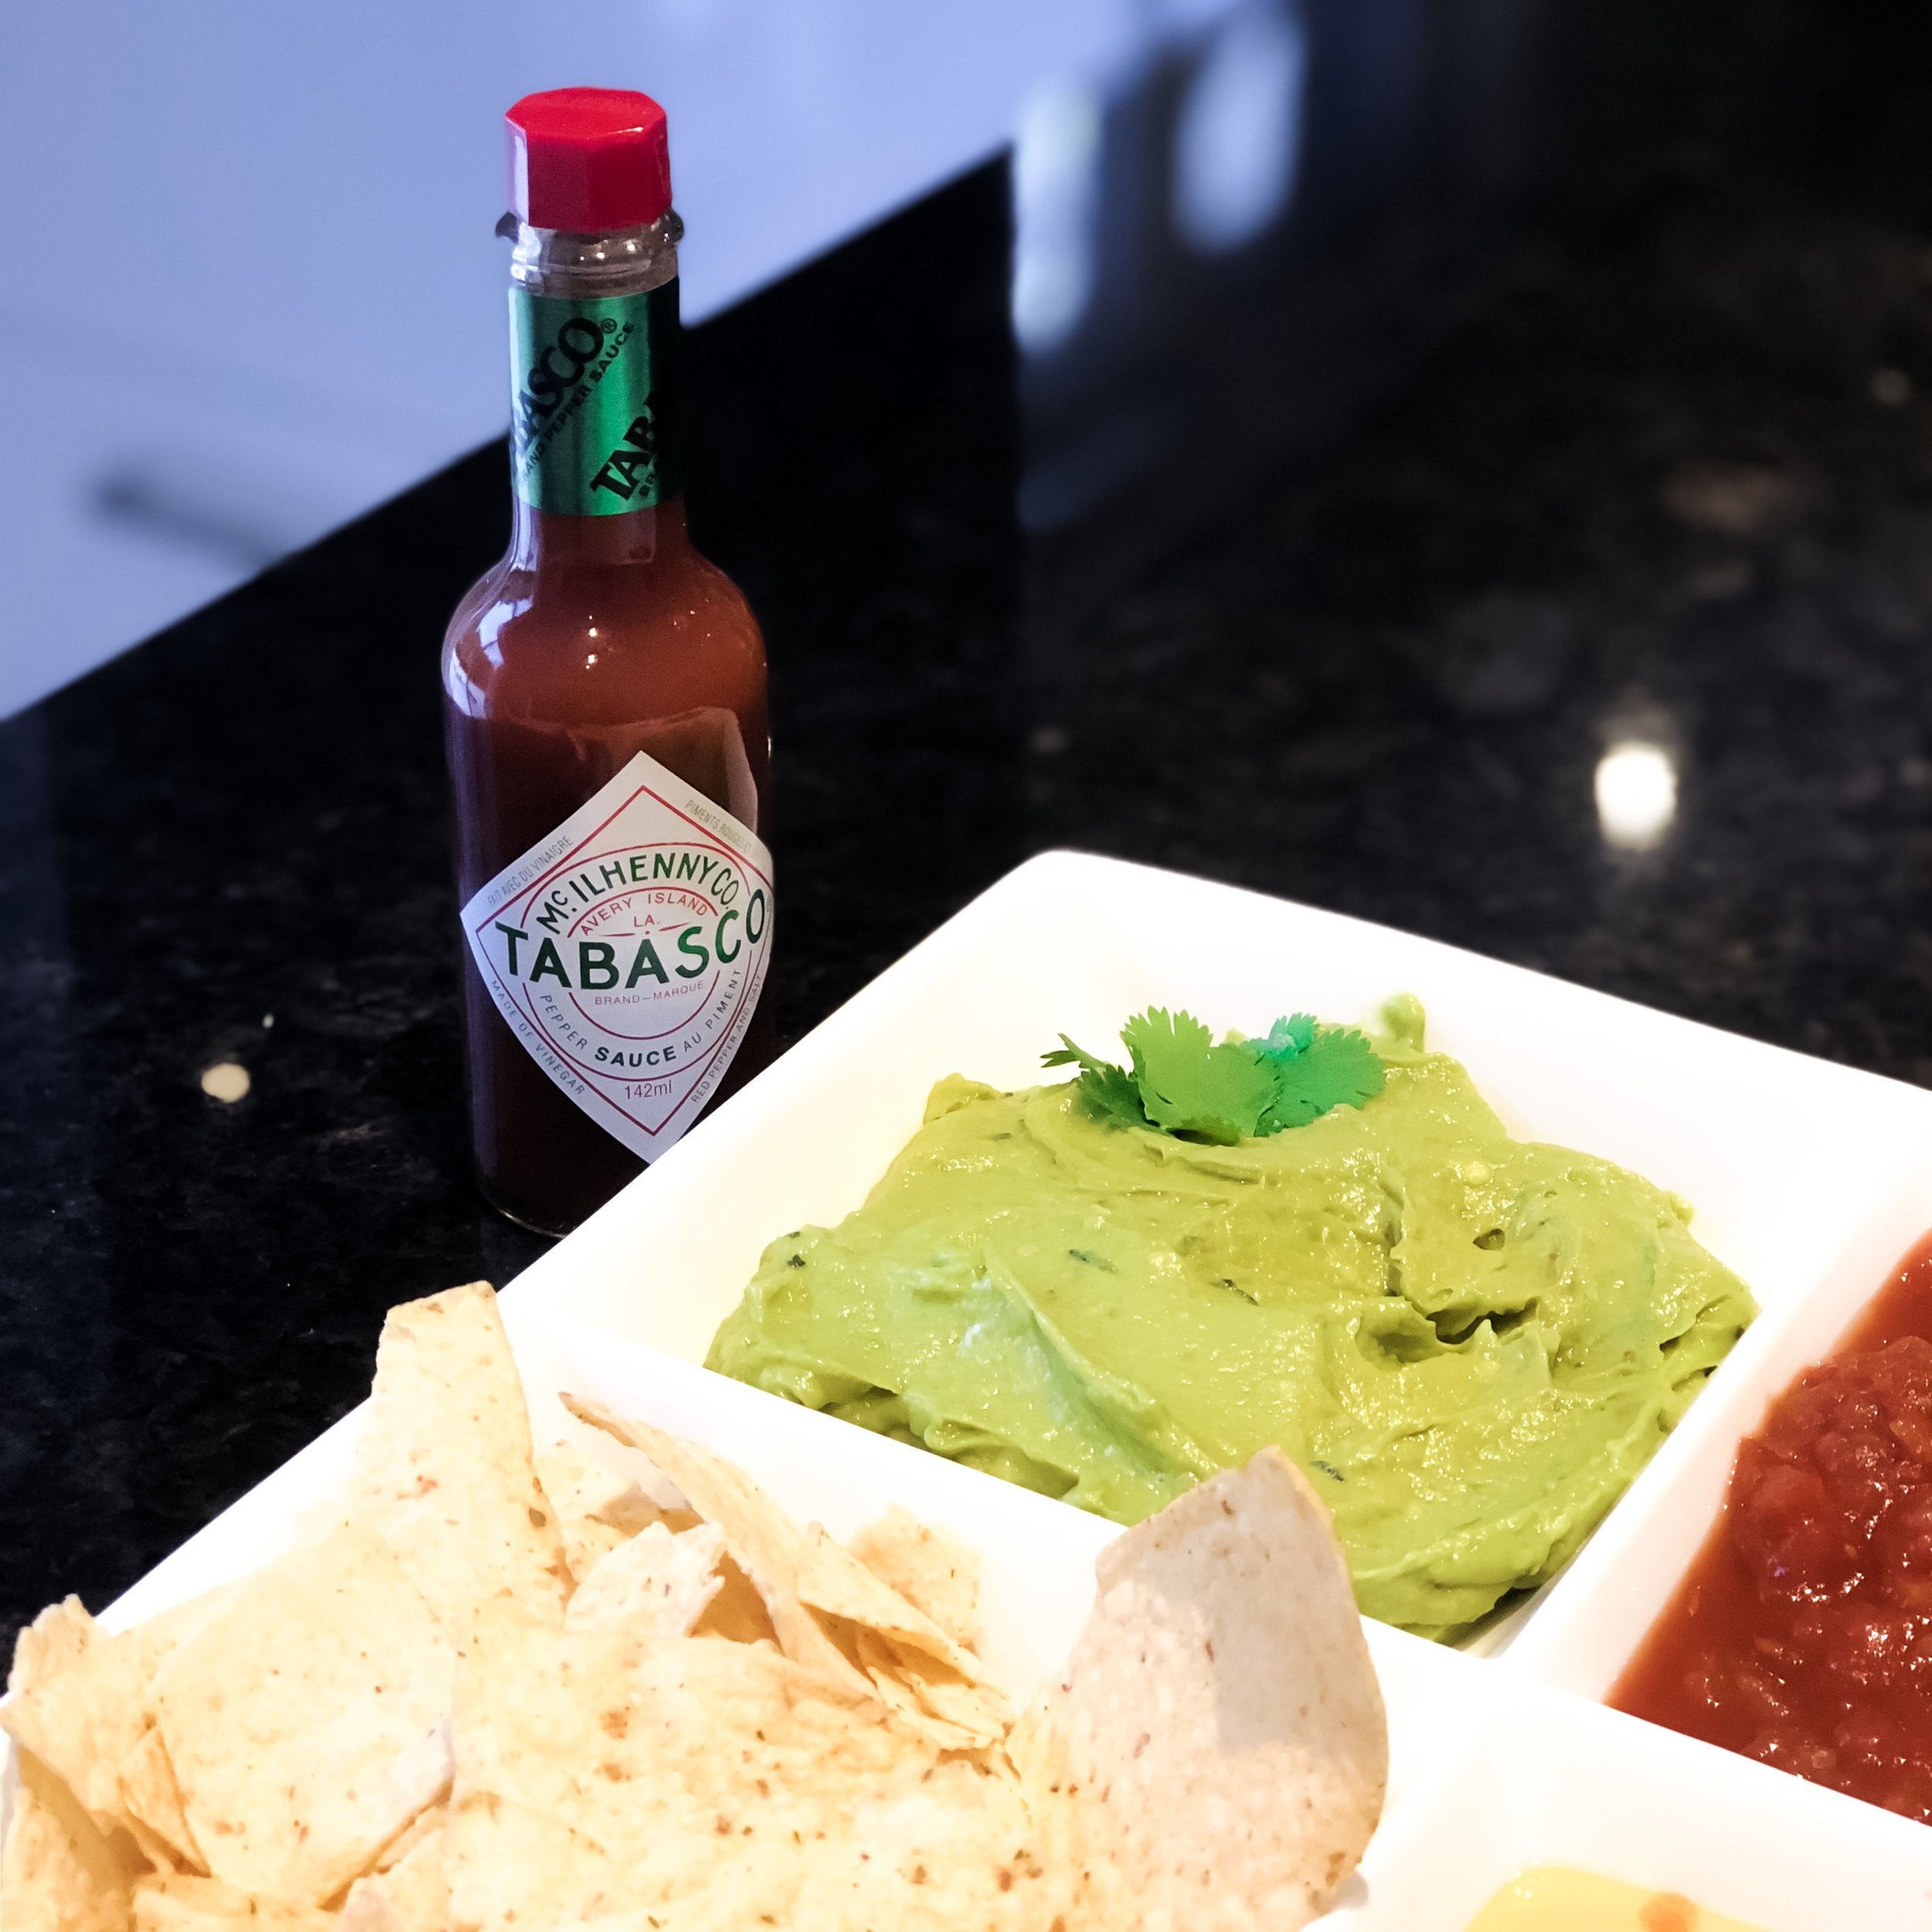
Your friends will be lining up for game day when you decide to spice up your appetizers this year with TABASCO® Sauces. I’m sharing my drool worthy Cheese Dip, Guacamole and Bean Salsa recipes with an added twist: the TABASCO® Brand Pepper Sauce, Chipotle Pepper Sauce and Green Jalapeño Sauce. They can all be found in the “Sauces” aisle at your local Walmart near the other condiments.
The TABASCO® Brand Pepper Sauce is made with only 3 ingredients: aged red peppers, salt and distilled vinegar. It can be used in almost any dish and adds a kick of spice that your guests will obsess over! I used it in all 3 of my recipes and it’s a staple in my kitchen, but depending on the type of spice or flavor you want to add to your dishes, you can substitute it for the other 2 as well! You can also leave the bottles out for your guests to add as they please to their food.
You can make this salsa as chunky or as smooth as you want! Depending on the consistency you’re looking for, you can add the beans and tomatoes to a blender before adding the rest of the ingredients. We love foods with an aded kick of flavor so we were super generous with the TABASCO® Sauce.
Add 1 can of black beans, rinsed and drained to a bowl. (You can add to a food processor and chop or blend depending on the consistency you want your salsa to be!)
Add 3 large tomatoes, seeded and diced (for a chunky sauce) OR add to the same food processor as the beans and blend.
1 small onion diced
1/4 cup chopped fresh cilantro leaves
1 tbs lime juice
2 tbs TABASCO® Sauce of your choice (I recommend the Pepper Sauce or Chipotle Pepper Sauce!)
Surprise your gameday guests with this fun twist on a classic cheese dip! You can mix in the TABASCO® Sauce while making it, drizzle it on top (OR BOTH!).
In a medium sauce pan, warm over medium heat 3 tbs of butter and 2 tbs of flour
Add 1 cup of milk, while stirring constantly
Add 1 cup of shredding sharp cheddar cheese
Continue to stir and mix until fully melted
Add in 1 tbs of TABASCO® Sauce (the flavor of your choice!)
Top with chopped chives
Optional: Drizzle TABASCO® Sauce on top of the dish once ready to serve (I recommend the Green Jalapeño Sauce)
For a creamy guacamole add all the ingredients to a blender! For a chunkier guacamole, follow the recipe below!
Add 4 ripe guacamoles to a bowl (KEEP THE PITS!)
Add the juice from 1/2 lime
Add 1 large tomato diced
Add 1 large onion diced
Add 1/4 cup of cilantro chopped
Add 1 tbs of TABASCO® Sauce (I recommend the Chipotle Pepper Sauce or the Green Jalapeño Sauce)
I would love to hear how you use the 3 TABASCO® Sauces in your recipes! Comment below so that I can give them a try. Don’t forget to visit the link below (click on the image!) to earn CASH BACK on your purchase of TABASCO® Sauces at Walmart! #FlavorYourWorld #CollectiveBias
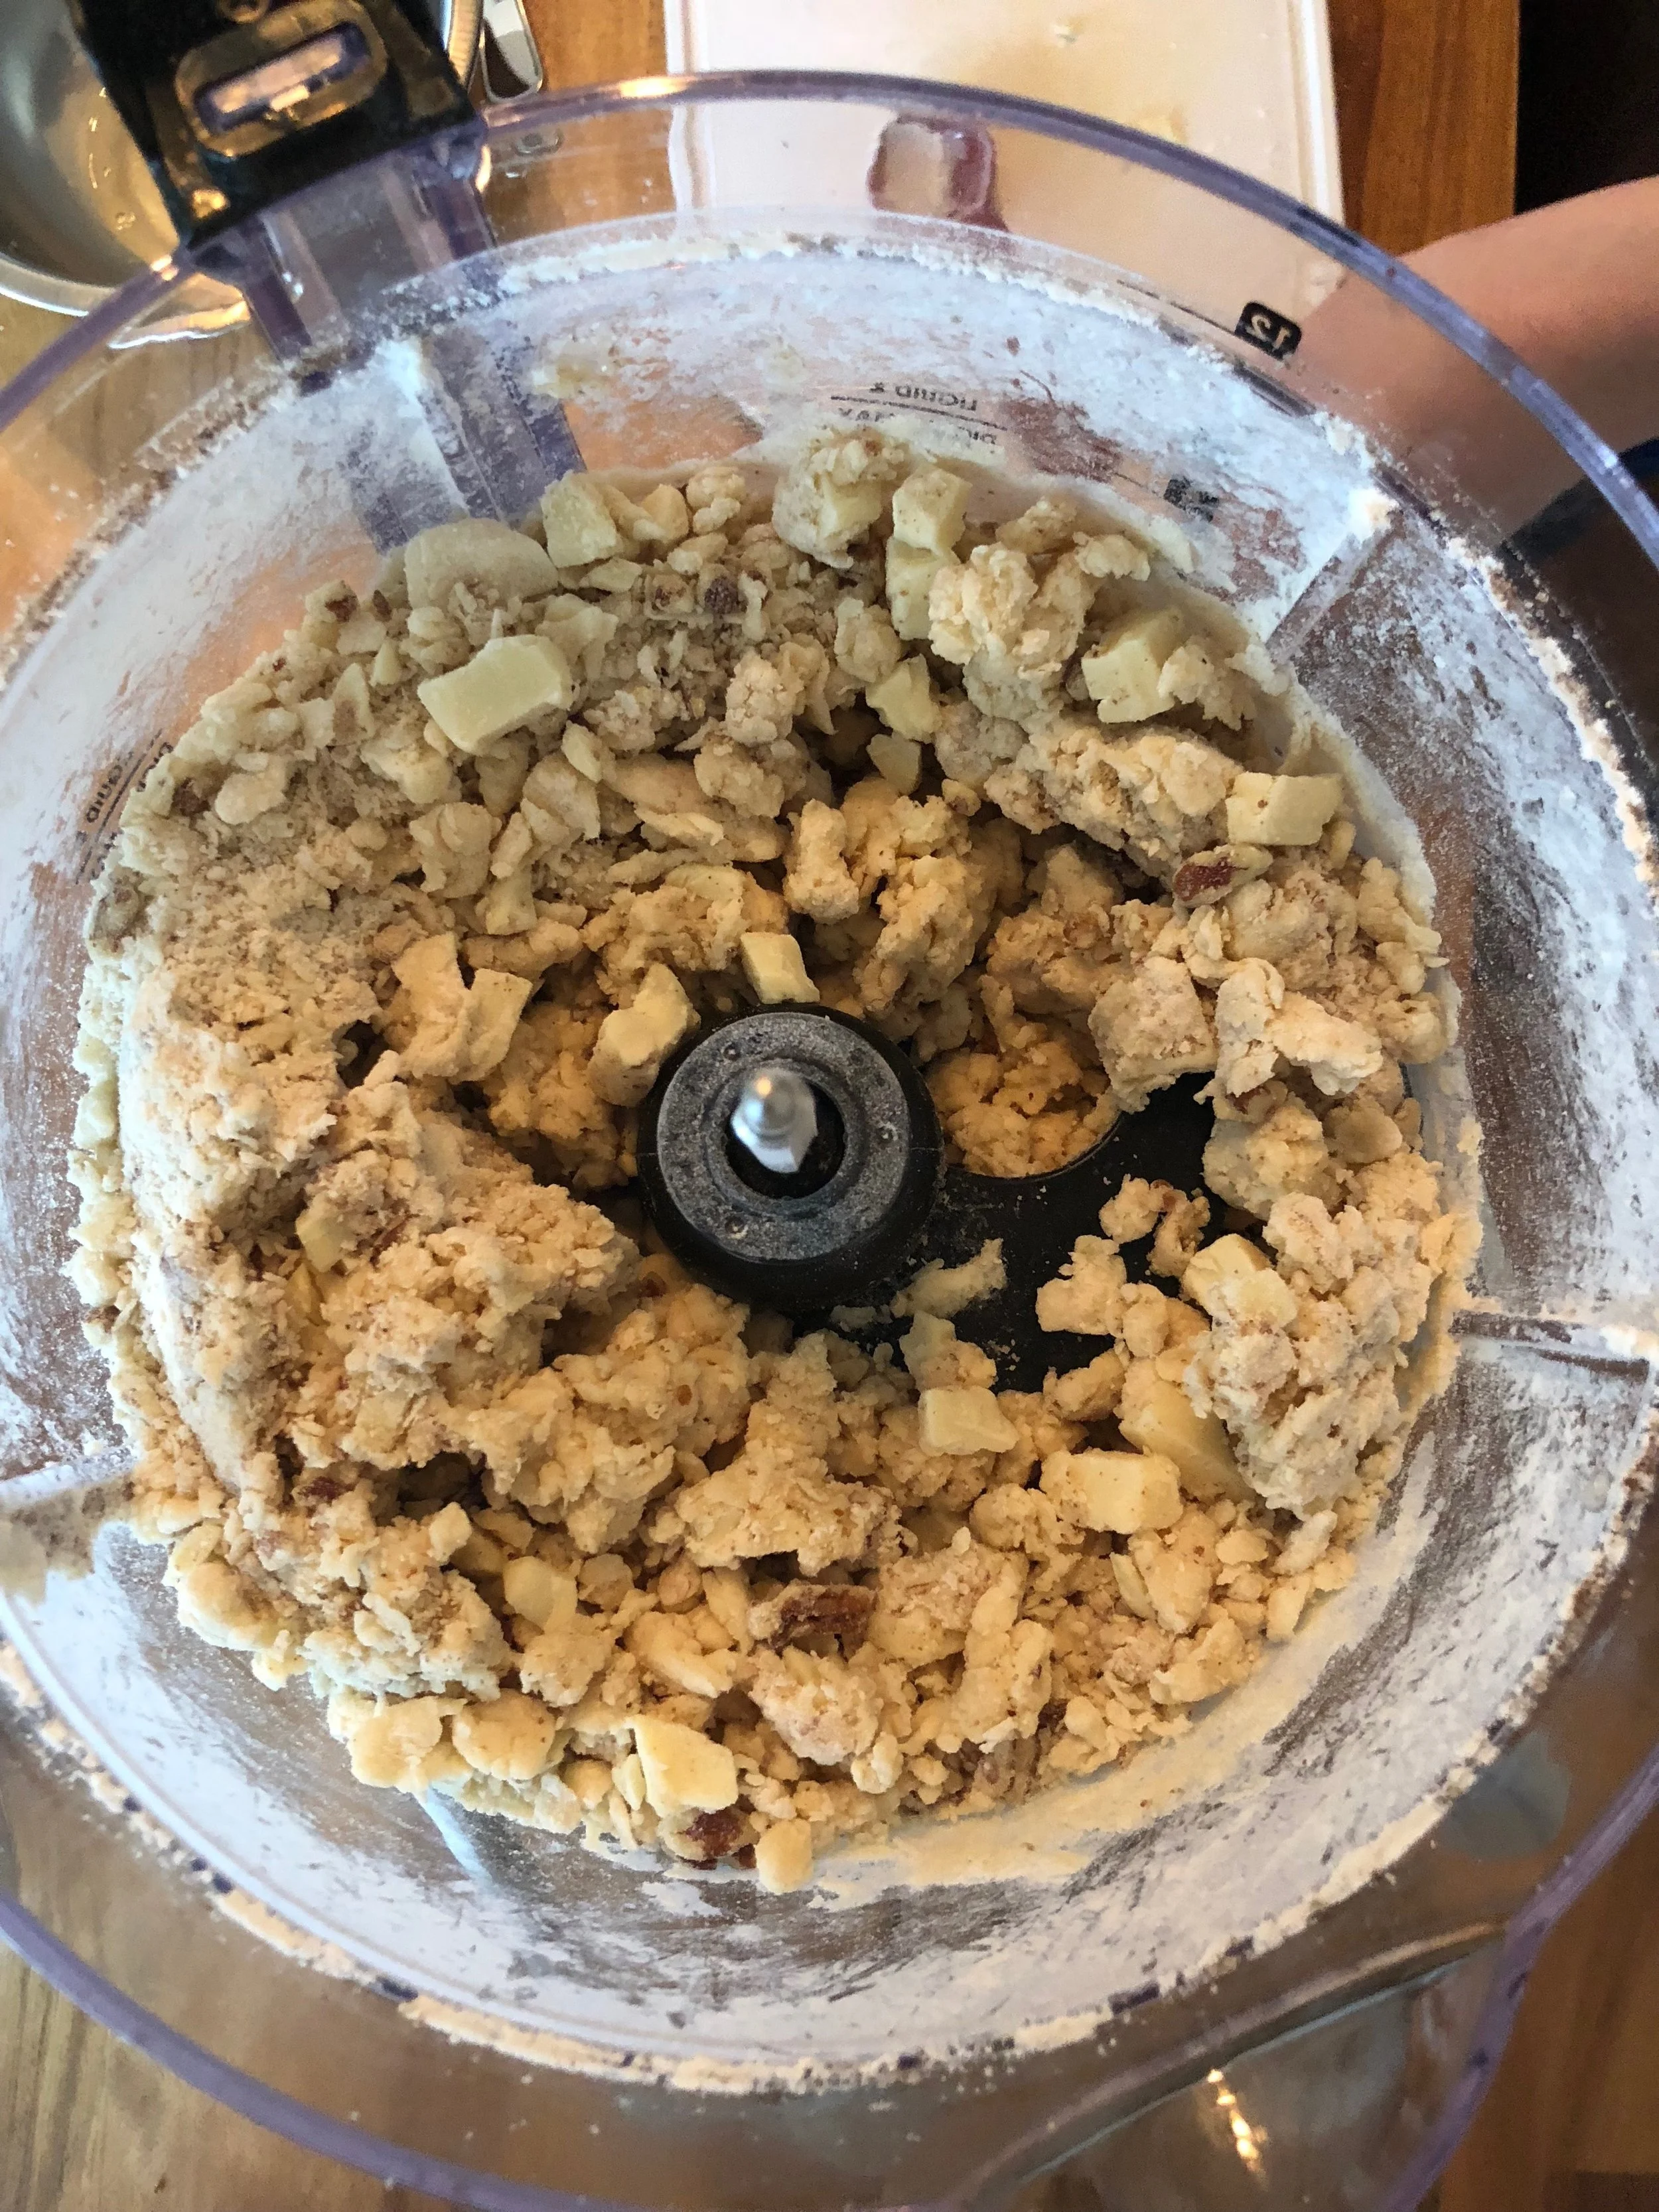
This weekend I busted out the ULTIMATE tool: the Hamilton Beach® Professional 14 Cup Dicing Food Processor and got baking with a good friend of mine :). If you've been looking for the perfect gift idea for Mother's Day.... look no further! This machine does it all: it dices, slices, shreds, kneads, chops, mixes and purees. Seems too good to be true... right? Well I put it to the test with homemade scones - and spoiler alert: they were DELICIOUS, so easy to make because of Hamilton Beach's food processor, and took under 30 mins from start to finish!
My fave feature of Hamilton Beach's Professional 14 Cup Dicing Food Processor is that it's really quiet... much quieter than the others out there. It also comes with a super practical storage box to keep all the accessories organized which means no searching through my mess of a kitchen drawer to find them! But the best... the blades, bowl and lid are all dishwasher safe #mom win. It would made a great gift for Mother's Day... or for yourself :). This recipe, from start to finish, took 30 mins thanks to this food processor that can do it all!
What you'll need to make the most delicious White Chocolate and Pecan Scone Recipe (taken and slightly adapted from geniuskitchen.com)
Ingredients:
2 cups flower
1/3 cup sugar
2 tsp baking powder
1/3 cup salted butter
1/2 cup milk
1 large egg
1 tsp vanilla
6 ounces white chocolate
3/4 cup pecans
Directions:
These scones are sure to please anyone you have over for Mother's Day brunch! They were so easy to make thanks to Hamilton Beach's Professional 14 Cup Dicing Food Processor! I can't think of a better Mother's Day gift than this! It's a must have in every kitchen!
We recently discovered President's Choice's fully cooked chicken strips and have been hooked ever since. They're the perfect quick weeknight dinner and a great option for our baby sitter when she needs to cook for Zane! All you do is Heat and Eat! And what better way to sneak in some fruits and veggies than with some quick and easy homemade dips? We paired our strips with a Mango Curry Sauce, a Pico de Gallo and an easy peasy Guacamole. You can make all 3 in under 10 mins!
Add the following ingredients into a blender and blend:
2 mangos peeled, pitted and sliced
2 tbs of orange juice
1 pinch of curry powder
1 tbs of vegetable oil
Salt and pepper to taste
Dice the following ingredients and mix well:
Juice from 1 lime
1 tomato diced
Coriander to taste
1/4 onion
1/4 red pepper
1 tbs olive oil
Salt and pepper to taste
I used a blender for this guacamole to make it easier for Zane to dip but you can mix it by hand for a more chunky sauce. TIP: Keep the avocado pit and leave it in the centre of your guacamole until you're ready to eat it - it will stop it from turning brown :)
2 ripe avocados
Juice from 1 lime
1/2 tomato
1 small onion
Pinch of garlic
Salt and pepper to taste
Rambo has officially joined the list of men in my life who are picky eaters (lucky me), so I decided that instead of spending money buying treats that he hates, I would make him some delicious homemade cookies! It also gives me peace of mind knowing EXACTLY what's going in them... and the fact that he loved them didn't hurt either! I wish I could say that finding a great recipe was easy... but it wasn't. I had 3 failed attempts before finding 2 that he loved, but I guess good things don't always come easy! I hope your little fur baby enjoys them as much as Rambo did! I made him Crunchy Ginger Cookies and Mini Muffins!
I would love to see pics of your fur babies enjoying these treats so please tag me in your pics on Instagram :) @mrsnewmommtl
Set of 3 Chalkboard Glass Canister Jars
Chalk board labels - turn any jar into a chalkboard!
Set of 5 Airtight Glass Canisters
My son is now eating solids and becoming more and more curious about textures and food tastes, so this mama has been trying to come up with creative ways to please his ever developing palate! It should come as no surprise to me (because I know who I married) that my son is a picky eater already like his father... forget vegetables and anything healthy... my son has a sweet tooth and a desire for anything savoury! I've been forced to become a bit creative in the kitchen to make sure he's getting enough vitamins and minerals from his food, so I was SO thankful when I discovered Baby Gourmet's Squoosh packs. They are snack sized organic fruit and veggie purées that taste DELICIOUS and each has a full serving of fruits and veggies! In case you're wondering, I have ABSOLUTELY tasted one before - if the food is good enough for my mini, it should be good enough for me! And in this case it definitely is! Zane's fave is the Squabbleberry Squoosh which has apple, blueberries, bananas and butternut squash, so I decided to try to make a more textured snack with his fave purée pouch and the result was a terrific muffin!
Total Time: 30 mins
Servings: 16 Muffins
Ingredients:
Directions: